Chair Re-Do... trash finds...Before & After
Plaint stand...more trash finds... Before & After
I found this antique chair and plant stand in the trash. I thought they would make a perfect addition to my new sewing room...which has been on my wish list for months since my son moved into his new home and I have a spare room to design. So I have this big empty room that I have been slowly thinking about how I want to design it when I came upon these two wonderful items. You can view many of my items on my wish list for my new sewing room at http://pinterest.com/aggieray/sewing-room/.
Chair Before
Plaint Stand Before
.
remove seat cushion, usually it is screwed thought the bottom
Cover stained chair and plant stand.
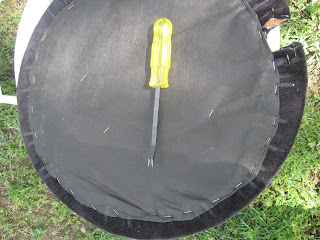
While stain was drying, I started on the seat cushion. remove stapled with an upholstery staple remover. Worth the investment, saves time and fingers. You may also use pliers. This chairs padding was worth saving. It was in great shape. I wanted to added extra softness, so I added more batting. Cut a piece larger than the chair cushion allowing the batting to lap over the sides and to the underside, enough for stapling.
Existing chair padding
Batting on top of existing chair padding, lining on top of batting. I added a piece of white lining before my top fabric to so the look of the cotton quilt fabric which I chose would be have a smooth appearance.
Flip chair cushion upside down. Align lining and batting for stapling. Place 4 staples in the lining, one staple on each quarter side. Next, move around the piece gently holding lining in place and ease fabric as you staple. Slip over the result is a nice smooth surface for your quilt fabric:Ease fabric as you staple.
I had to work with two small cut outs in my chair cushion. After the the majority of the cushion was stapled in place, I place two small slits in the center of the cut outs and worked the fabric in the cut out and stapling along the way.
Thanks to http://www.centsationalgirl.com/2012/04/gold-leaf-desk-chair/ I decided to use the Benjamin Moore "Thunderbird" Advanced Paint in a high gloss finish. It is a beautiful paint to work with.
Apply paint with a good quality brush,makes a huge difference in the look. Allow to dry 24 hours before using. I attached the completed seat cushion with the existing screws. All ready for my new sewing room... which is months away from being started :(. Hope to detail that too!


